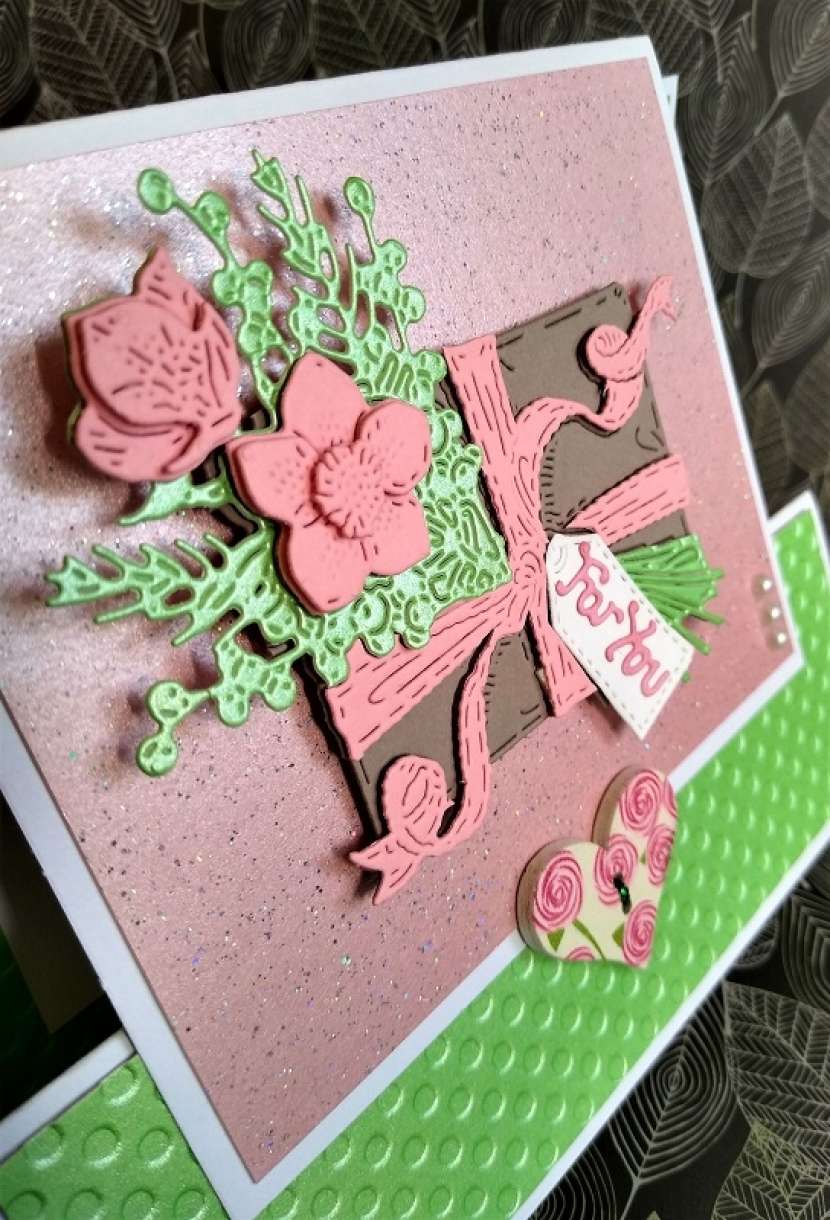
Reverse Easel Card
0
Posted on 14th July 2020 by Louise Thompson
Filed under


You will need the following craft card and craft supplies:-
- A4 White Card Plain 250gsm
- A4 Rosa Sparkle Print Card 300gsm
- A4 Spring Green Pearlised Card 300gsm
- Embossing folder
- Floral Die
- Button
- Pearls to decorate
- Take the sheet of A4 White Card Plain 250gsm and cut down to 8 1/4" x 5 3/4"
- Score this in half at 4 1/8" to form a card blank.
- Score the front cover of the card blank halfway at 2" and fold it so that it forms a z-fold.
- Take a piece of A4 Spring Green Pearlised Card 300gsm and cut one panel to 5 1/2" x 1 3/4", and another panel down to 5 1/2" x 3 3/4".
- Emboss both Spring Green Pearlised Card 300gsm panels with an embossing folder of your choice (I have used a polka dot one for this card)
- Stick the smaller panel on the front part of the Z-fold
- Stick the larger panel inside the card blank.
- Take the remaining piece of White Card Plain 250gsm and cut down to 7 1/2" x 4 1/2"
- Score this in half at 3 3/4" to form a mini card blank.
- Cut down a piece of A4 Rosa Sparkle Print Card 300gsm to 4 1/4" x 3 1/2" and stick onto the front of the mini card blank
- Using the leftover Spring Green Pearlised Card 300gsm, Rosa Sparkle Print Card 300gsm, White Card Plain 250gsm & Cashmere Sirio Colour Card 290gsm, die cut a floral shape and layer it onto the front of the mini card blank using foam pads.
- Stick the mini card onto the inside of the main Z-fold card blank ensuring that it is central horizontally, and is positioned half an inch up from the central crease.
- Using some twine, secure the button onto the front of the Z-fold card centrally horizontally, and approx 1 inch up from the bottom so that the mini card front tucks in between the button and the front of the Z-fold and holds the card into place.
I hope you will have a go at making one of these cards - the pearlised card and sparkle print card really makes it pop!


Nobody has commented yet
Be the first to comment on this article by using the form below.