Autumnal Hexagonal Pop Up Birthday Card
0
Posted on 27th September 2019 by Louise Thompson
Filed under
Today I am going to show you how to make this autumnal themed birthday card. It's a Hexagonal Pop-up Box Card that folds flat for posting.

You will need:
- Fleck Kraft Card 220gsm
- Orange Glow Sirio Pearl Double Sided Card 300gsm
- Mocha Brown Plain Card 240gsm
- Bon Bon Sparkle Print Card 300gsm
- Amber Sparkle Print Card 300gsm
- Stick It! Ultra-clear double-sided tape - 6mm x 5m
You will also need:
- Wildlife dies (First Edition)
- Happy Birthday Die (Crafters Companion)
- Acorn embossing folder (Docrafts)
- Nesting Hexagonal dies


To make the card -
Cut out the template as shown above
OR cut out three hexagons - with edges that measure 2 1/2", and two pieces of card that measures 2 1/2" x 7 1/2" and then fold it into thirds. Then lay the two hexagons and the strip out so it looks like the template (part 1 & part 2). Tape these pieces together to form your own template that you can draw around.
Lay your template onto your Fleck Kraft Card 250gsm

Draw around your template onto the card below.

Cut around the pencil edges so you are left with two pieces of card that look like your template.

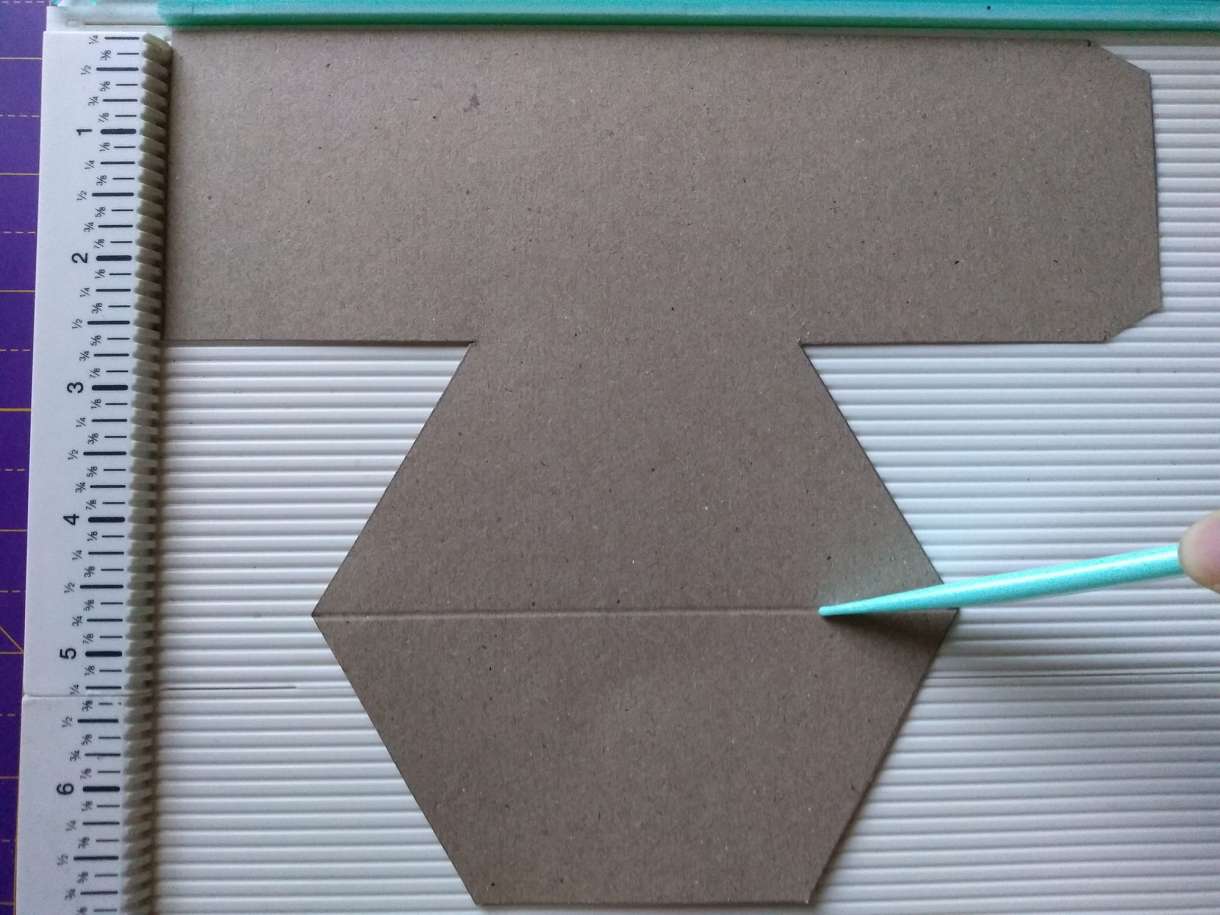
Take part 2 and score the hexagonal part in half as shown -

Now score at 2 1/2", 5", and at 7 1/2" as shown:-

Take your other piece of card and score at 1/2", 3" and 5 1/2" along the rectangular part as shown:-

Turn your card anticlockwise and score the right hand hexagonal part in half:-

Fold along all your scorelines:-

Add Stick It! Ultra-clear double-sided tape - 6mm x 5m to the bottom half of the hexagon and also onto the right hand tab as shown.

Add Stick It! Ultra-clear double-sided tape - 6mm x 5m to the tab of your other piece:-

Turn the larger piece (part 1) over so that the folds become valley folds - and so that the tape is facing the work surface. Place the smaller piece (part 2) on top as shown - so that the rectangular part of each piece lines up with each other. Fold your tabs in, and stick the left hand tab of the larger piece to the inside of the smaller top piece:-

Keeping both pieces lined up and flat, gently stick down the right hand tab to the inside of the back piece of card:-


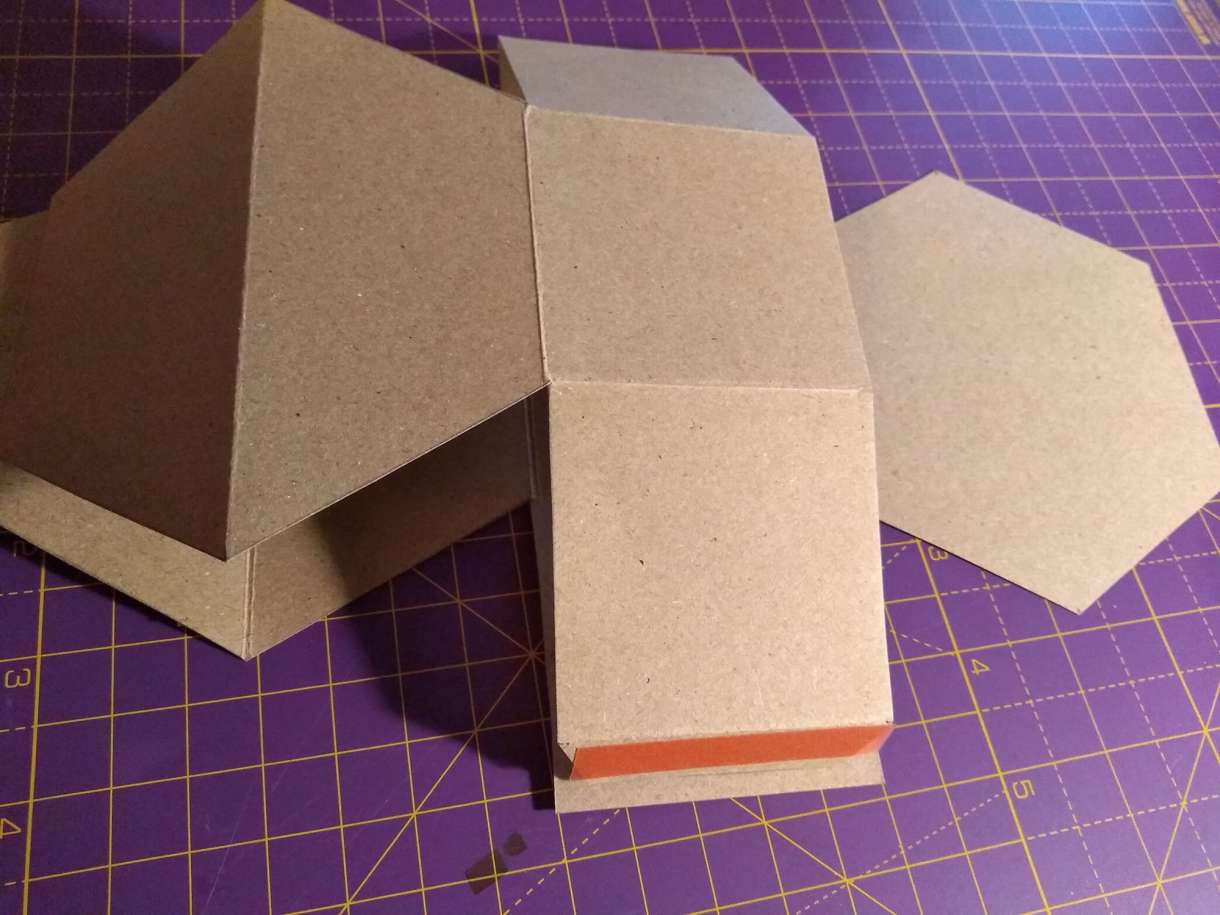
Fold the two bottom hexagons in half and tuck them up inside the box that you've now formed - so that they partially pop out the top:-

Gently pull back the top hexagon to reveal the taped hexagon below:

Peel off the backing of the tape and stick the two half hexagons together. Now you can push this piece back down into the base of the box - and you will find that the box has taken shape:-


Next, cut out 9 squares measuring 2 1/4" x 2 /1/4" from the Mocha Brown Plain Card 240gsm, and stick them around the outside of the box and also inside in the back 3 panels of the box.
Cut out 9 squares measuring 2" x 2" from Orange Glow Sirio Pearl Double Sided Card 300gsm. Place these one by one in an embossing folder to emboss the acorn pattern onto them. Next, stick them into the centre of the mocha brown square panels.

Cut out 2 brown hexagons from Mocha Brown Plain Card 240gsm that are slightly smaller than the main kraft hexagon.
Stick one of these hexagons onto the main back hexagon.
Cut the other one in half and stick onto the front of the inside pop up piece.
Cut out 2 slightly smaller orange hexagons from Orange Glow Sirio Pearl Double Sided Card 300gsm.
Emboss them with the same embossing folder as before, and then stick one of them into the centre of the brown hexagon. Cut the other orange hexagon in half and stick it onto the other brown half hexagon (on the front of the pop out piece)


Die cut some woodland creatures out of Mocha Brown Plain Card 240gsm, Fleck Kraft Card 250gsm and Orange Glow Sirio Pearl Double Sided Card 300gsm and stick them around the outside of the card (making sure you keep some for the middle pop out piece!)
Die cut some leaves from the various coloured card and stick onto acetate strips. Arrange these leaves and attach to the rear of the pop out piece. Add your woodland creature in the centre.

Die cut a Happy birthday sentiment and add to the back hexagon.
Your card is now complete! This is such a great card shape and can be used for any occasion. Please fee free to share your take on it on our Facebook page


Nobody has commented yet
Be the first to comment on this article by using the form below.